Station and PLC Tablet Connection Demo
PLT Total Station and PLC Tablet Connection
Connecting your PLT and your PLC tablet comes down to a few basic button pushes.
Turning on the PLT Total Station
Once you have inserted a battery into and closed the battery compartment, check to make sure the tool is secure and level. When ready, simply press the single power button on the top of the PLT to turn the tool on. You will hear a beeping noise indicating it has turned on.
Use HCL Software to connect to your Total Station
On your PLC tablet, open the HCL software by pressing the HCL icon. When open, go to the settings gear (1) > "Tool and Connection" tab (2).
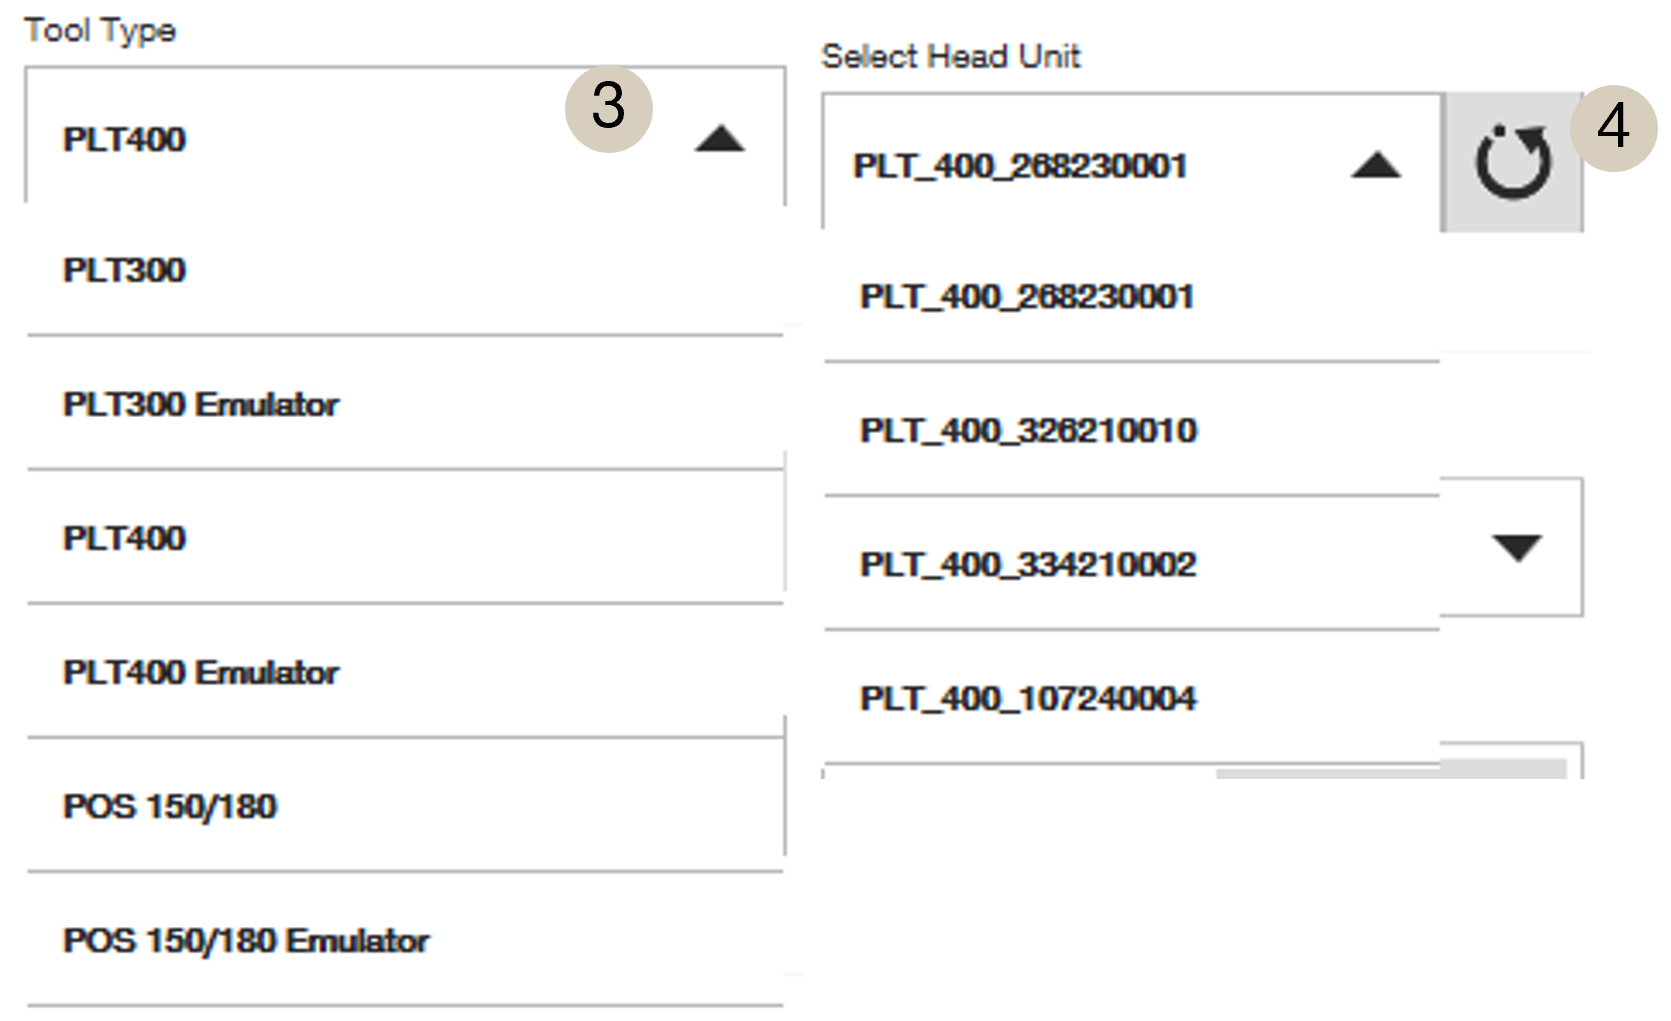
Make sure the tool type you are working with is selected from the drop down menu (3). When changing the Tool Type, HCL will prompt to restart the application to switch the tool.
After it, in the same settings, make sure that you press the refresh icon under "Select Head Unit" to find your head unit from the available options (4). After waiting a few seconds, your tablet and tool should be connected and ready for use.
 Things to be Aware of when Connecting to the Tool
Do not select an "emulator" option when attempting to connect to a head unit. Emulator options are for trial/practice purposes only, it is not going to connect to a real tool.
Regarding the numbers associated with the head units in the selection menu: these are the serial numbers of the tools that the software finds to be in range. If you are worried about finding the correct head unit to connect to, you can see the serial number of your head unit on the sticker within the battery bay of the tool.
Making Sure Connection has Occurred
At the top of the tablet, you will see three icons that indicated whether the tool is connected or not:
RED icons means that no tool is connected. When those icons are clear of the red warning icons, the tool has been connected to the tablet, and a small red dot will appear in the PLT icon indicating it is ready to measure:
Please see this article for WiFi connectivity problems, if they are occurring.
Other Settings within "Tool and Connection" Section
- Auto Connect: Keep this turned on when you want the tool to always search and connect once a tool is nearby. Turn it off, for instance, when multiple units are nearby and you need to control how each unit connects to a tablet.
- Connection Type & WiFi Channel: WiFi or Radio are your options for connection type, with WiFi as default for PLT units. The radio option is only compatible for the PLT units with long-range Bluetooth extenders, which is a separate accessory. See this article for more information on WiFi connection and range optimization for connection.
-
Guide Light: Adjust this if you need to manage the red and green lights that flash on the telescope. "Auto" means that it will flash whenever the tool is in prism lock mode, but not yet connected to a prism. "On" keeps the guide light on until it is turned off (even if connected to a prism), and "Off" turns the guide light off all together.
- Note: the Guide Light helps visualize if the tool is turned right-side up (red light on left side, green light on right side), and it also helps you more easily visualize the telescope from a far distance.
- Stop Video Stream: Use this option to disable any video streams of the telescope's camera that is occurring in the background. This will help save battery on the tablet, and likely will improve WiFi connectivity, but it also means that the camera will load slower when opening camera applications, like manual targeting with the telescope.
- Frequency of Automatic Calibration: This is for the PLT 400. See this calibration article for more information. In "normal" mode, calibration occurs after every 10°C internal temperature change and then every 60 minutes. In "low" frequency mode, the first calibration happens 60 minutes after startup, then continues at 60-minute intervals.
Comments
0 comments
Please sign in to leave a comment.